Back in college, I lived with 4 other guys in an older house. We all had A/C units and all liked to live and sleep in sub-70 temperatures. Needless to say, we popped breakers quite often. While we could quickly and easily reset the breaker, I had a PC tower that lost power and needed to be restarted every time a breaker popped. The solution: a UPS. To be more specific, I bought a Geek Squad 1500VA aka GS-1500u aka re-branded CyberPower 1500VA.
2 years later, I moved out of the house into an apartment. When I moved into the apartment, I plugged in the UPS and experienced symptoms where the screen would flash when trying to turn it on. After trying various things on my own, I searched Google, but found nothing helpful. I ended up giving up- at the time, having a UPS wasn't a huge need for me as my new apartment didn't have the power struggles I experienced in the old house.
Fast forward to present day (3.5 years later). I just bought a house (yay me) and for whatever reason decided to take another stab at fixing the UPS. I can't believe I dragged it along with me all this time. After doing more Googling today, I found a post on fixya.com which contained comments with a link to a YouTube video.
Fast forward to present day (3.5 years later). I just bought a house (yay me) and for whatever reason decided to take another stab at fixing the UPS. I can't believe I dragged it along with me all this time. After doing more Googling today, I found a post on fixya.com which contained comments with a link to a YouTube video.
The video describes exactly my symptoms, but alas it appeared nobody had found the problem and thus the solution. In my frustration, I smacked the side of the UPS and low and behold, it started working! I would describe my level of excitement as being somewhere between Ben Stein and a moderately spoiled teenage girl who has just been gifted a brand new BMW. As I lifted the UPS to move it, it went back into it's flashy, not working state. After setting it back down, smacking it around a bit, my educated guess was some flaky wire connection.
The Solution (and story continued...)
I popped open the black front cover:
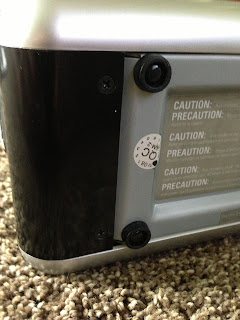
- 2 small black screws on the underside of the black front cover (see pic below)
- slide down the black part of the front cover about 1/2", then pull straight out
Directly behind the front cover, I observed the battery and connecting wires.
I nudged these wires around a bit and realized they were the culprit. After taking the battery out and looking at the connectors, I realized the only thing needed was a tighter connection. I simply crimped the female connectors on both red and black wires. Put it all back together and you've fixed your otherwise useless hunk of plastic!
As I mentioned before, I am a new homeowner. This is my first blog post, but I intend to have many more. I hope you enjoyed reading!
Cheers, Jeff


